
CO 8 stitches
Row 1: Main Color. K all stitches (8). [this is a flat row]
Row 2: MC purl 2, knit across. [this row makes background stitches]
Row 3: Contrasting Color. K all stitches.[this is a flat row]
Row 4: CC knit 2, purl across. [this row makes your design]
Row 5-12: repeat rows 1-4 twice.
Row 13: MC Knit.
Row 14: MC Knit.
Row 15: CC Knit.
Row 16: CC Purl.
That will give you a letter "T". This is the "T" from the top view. Looks just like rows of stripes from here.

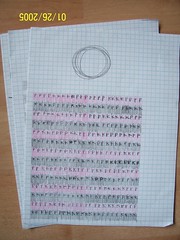
In the scarf it's done with two more background stitches on each side, but otherwise the same. My chart looks like this: (The pictures and charts I'm using are for a scarf that has the "T" or other letter patter twice, with blank stitches on each side. So it's 24 stitches across)


So if you can do that, you can really do any illusion pattern. I'll give the pattern for this scarf, which I charted out by hand. Letter by letter, square for square. I really should have cheated with it but I didn't. One resource that's great for illusion patterns: cross stitch charts! Everything is already made up in nice neat squares, and you're ready to go. If you compare the first chart and the second ones, you can see that when you chart it out, the illusion only goes on every fourth row. DO NOT FORGET THAT! The row two rows before the illusion row is the background row, which is the illusion row with OPPOSITE stitches (knits are purls and purls are knits). I like to chart my things out just as I would knit them. I draw a primary chart with just the illusion, and then I chart it all out with both colors and what each stitch will be. It's a lot easier for me to follow a chart like that than one with symbols and all kinds of crazy stuff.

I think the best learning is to design your own illusion knit piece. The only limitations are that you need to use one contrasting color on a background, and some things just may not look right. You just have to try it and find out.
So here are some suggestions of things to knit using this technique:
-Card Trick Illusion Scarf - I love this! It was my first illusion knit project, and I'm so glad I did it! Thank God for Knitty Gritty! (Which is basically the only resource I've used to learn about this, other than my knitting.)
-My "TONI" illusion scarf- Once I get a whole alphabet's worth of illusion letters this might be better. But if you know a girl named Toni, you should knit this for her! I need to get the last chart uploaded, and then I'll really put the pattern up.
- Naughty/Nice scarf from Son of a SNB. This is my favorite illusion pattern! Such a great idea.
Here are some search results on ravelry for "illusion knitting". There is a lot of cool stuff!
Illusion scarf from the top, and from an angle:


If you have any questions, feel free to ask!
And if you really liked it or found it useful, it would be wonderful if you would donate something. Anything is welcome! <3
Thank you so much! Very clear explanation. Hope you keep up this blog!
ReplyDelete